
How to Set Up a WordPress Site on SiteGround in 2025
How to Set Up a WordPress Site on SiteGround in 2025
You're ready to launch your own website, but the technical stuff feels overwhelming. Don't worry—this guide walks you through every step, from picking a hosting plan to getting your first post live. By the end, you'll have a professional WordPress site running on SiteGround, even if you've never done this before.
Disclosure: This article contains This is an affiliate link. We may earn a commission at no cost to you.
affiliate links. We may earn a commission at no extra cost to you.
Introduction
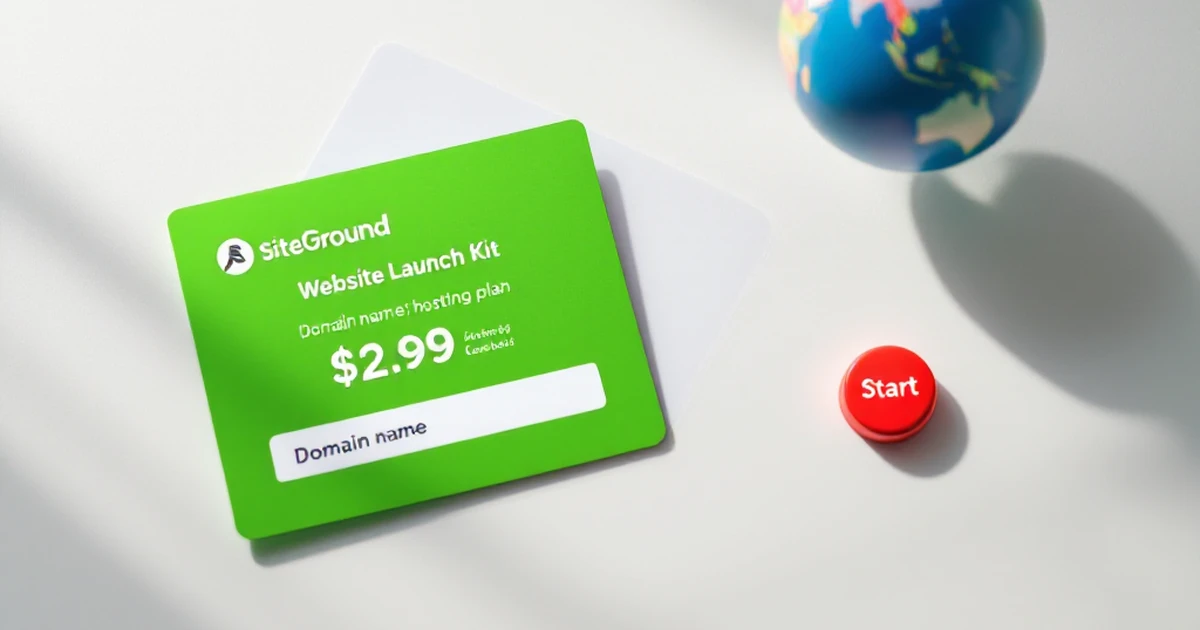
If you're looking for a reliable solution, SiteGround (Reliable hosting with 24/7 support. Recommended by WordPress.org.). Get SiteGround Hosting.
So you want to build a website in 2025. That's a smart move. Whether it's for a blog, a small business, or a school project, WordPress is the best tool for the job. And SiteGround is one of the top hosting companies to run it on.
For best results, consider Kinsta – Google Cloud-powered WordPress hosting with 99.9% uptime guarantee.. Get Premium Hosting with Kinsta.
In this guide, you'll learn exactly how to set up a WordPress site on SiteGround. We'll walk through each step, from picking a plan to launching your site. You don't need any tech experience—just a computer and about 30 minutes.
Why does this matter? Because your site needs to load fast and stay secure. SiteGround gives you both, with built-in caching and free SSL certificates. Plus, their customer support is available 24/7 if you get stuck.
Here's what you'll need before we start:
– A domain name (like yoursite.com)
– A SiteGround hosting account
– A web browser (Chrome, Safari, or Firefox work fine)
That's it. No coding. No confusing jargon. Just a clear path to getting your site live.
Ready? Let's jump in and build something great.
What You Need

Before you start, let's gather the right tools. You don't need much, but having these ready will save you time.
Account and Domain
- SiteGround account: Plans start at about $2.99 per month for the StartUp plan. This is your web host.
- Domain name: That's your website's address, like
yourname.com. It costs around $12-15 per year. SiteGround gives you one for free with some plans.
Other Essentials
- A web browser: Chrome, Firefox, or Safari all work fine.
- An email address: Use one you check often. That's where your login details will go.
- A credit or debit card: You'll need it to pay for your hosting plan.
That's it. You don't need any special software or coding skills. Just grab these items, and you're ready to move on.
Step-by-Step Guide
Now let's get your WordPress site up and running on SiteGround. Follow these steps in order. You'll have a working site in about 30 minutes.
Step 1: Choose Your Hosting Plan
Log into your SiteGround account after you sign up. You'll see three hosting plans to pick from.
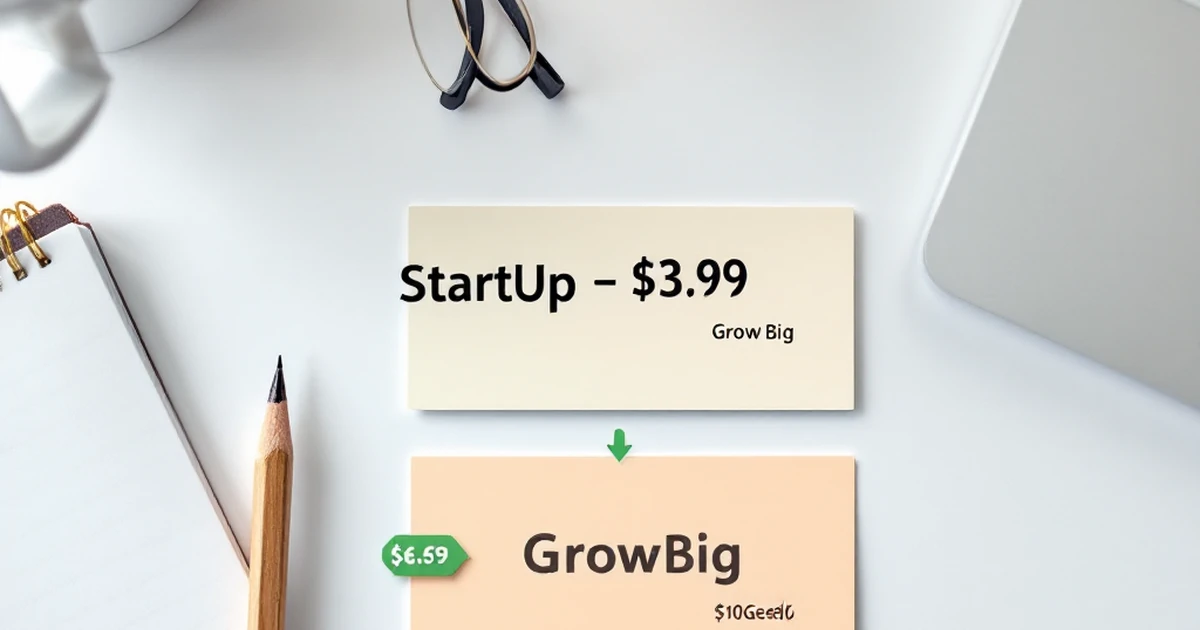
The StartUp plan costs $3.99 per month for the first year. It's perfect for one website with about 10,000 monthly visits. Most beginners start here.
The GrowBig plan is $6.69 per month. You get more features like the ability to host multiple sites. It also has faster performance for when your site grows.
The GoGeek plan costs $10.69 per month. It's for larger sites with lots of traffic. You probably don't need this one yet.
Pick the StartUp plan for now. You can always upgrade later. Click the “Get Started” button under your chosen plan.
Step 2: Register or Connect a Domain
Next, you need a domain name. This is your website's address, like “yourcoolblog.com.”
If you don't have one yet, SiteGround offers free domain registration for the first year. Type your desired name into the search box. Try something short and easy to remember.
If you already own a domain from another company, that's fine too. You'll need to update your domain's nameservers. SiteGround will show you the exact settings to use.
Your domain name should match your site's topic. For example, “soccertipsdaily.com” works better than “johnsblog2025.com.”
Step 3: Complete Your Account Setup
Now fill in your personal details. This includes your name, email, and billing address.
You'll also choose your payment period. The 12-month plan gives you the best deal. The 36-month plan saves you even more money, but you pay upfront.
Add any extra features you want. SiteDomain Privacy is a good option. It hides your personal info from public records. This costs about $12 per year.
Skip the extras you don't need right now. You can add them later. Review your total and click “Pay Now.”
Step 4: Install WordPress with One Click
After payment, you'll land in your SiteGround dashboard. Look for the “WordPress Install” button.
SiteGround makes this super easy. Click the button and follow the prompts. Choose your domain from the dropdown menu.
Leave the directory field blank. This installs WordPress on your main domain. If you add a folder name, it changes your site's URL.
Click “Install” and wait about 60 seconds. SiteGround will set everything up for you. You'll get a confirmation message with your login details.
Step 5: Log Into Your WordPress Dashboard
Now you have a fresh WordPress site. To access it, go to yourdomain.com/wp-admin. Replace “yourdomain” with your actual domain name.
Use the username and password from the installation step. SiteGround also emails these to you. Keep that email safe.
You'll see the WordPress dashboard. This is your control center. It looks busy at first, but don't worry.
The left sidebar has all your main tools. Posts, Pages, Media, and Settings are the big ones. Take a minute to look around.
Step 6: Choose and Install a Theme
Your site needs a design. That's where themes come in. They control how your site looks.
Go to Appearance > Themes in your dashboard. Click “Add New” at the top.
You'll see hundreds of free themes. Use the search bar to find something specific. Try keywords like “blog” or “business.”
For beginners, we recommend a theme called “Astra.” It's fast, lightweight, and works with most page builders. Click “Install” then “Activate.”
Your site now has a basic design. You can change it anytime. Don't stress about picking the perfect theme right now.
Many professionals trust Cloudways for this task. Try Cloudways.
Step 7: Install Essential Plugins
Plugins add features to your site. Think of them like apps for your phone. You need a few key ones to start.
Go to Plugins > Add New. Search for these must-have plugins:
First, install “Yoast SEO.” This helps your site show up in Google searches. It's free and very popular.
Next, get “Wordfence Security.” It protects your site from hackers. SiteGround has some security built in, but this adds extra safety.
Also install “UpdraftPlus.” This backs up your site automatically. If something goes wrong, you can restore your site quickly.
Install each plugin by clicking “Install Now” then “Activate.” You'll see new options in your dashboard sidebar.
Step 8: Create Your First Pages
Every site needs a few basic pages. Start with your Home page, About page, and Contact page.
Go to Pages > Add New. Give your page a title, like “Welcome to My Site.”
Write a short introduction. Tell visitors what your site is about. Keep it friendly and clear.
For the About page, share your story. Why did you start this site? What can readers expect?
The Contact page needs a simple form. You can use a plugin called “WPForms” for this. It's free and easy to set up.
Don't worry about perfect content yet. You can edit everything later. Just get something on the page.
Step 9: Set Up Your Site's Basic Settings
Now tweak a few important settings. Go to Settings > General in your dashboard.
Change your site title and tagline. The tagline is a short description. Make it clear and catchy.
Set your timezone to match your location. This affects post dates and times. Scroll down and click “Save Changes.”
Next, go to Settings > Permalinks. Select the “Post name” option. This creates clean URLs like “yoursite.com/my-first-post.”
Clean URLs help with search rankings. They also look better when you share links. Click “Save Changes” again.
Step 10: Write and Publish Your First Post
You're ready to create content. Go to Posts > Add New. This is where you write blog articles.
Give your post a catchy title. Keep it under 60 characters if possible. This helps with search results.
Write your content in the editor. Use short paragraphs and headings. Break up long blocks of text.
Add images to make your post visual. Click “Add Media” and upload a photo. Free photo sites like Unsplash have great options.
When you're done, click “Publish” on the right side. Your first post is now live on the internet.
Congratulations! You've set up a WordPress site on SiteGround. Your site is ready for visitors and future growth.
Troubleshooting

Can't See Your Site Yet?
Don't panic if your site doesn't show up right away. This is super common. Your domain name needs time to spread across the internet. This process is called DNS propagation. It can take up to 24 hours to finish.
Try checking your site from a different device. Use your phone's mobile data instead of your home Wi-Fi. If the site loads there, you're all set. You just need to wait a bit longer for your home connection to catch up.
The “White Screen of Death”
This sounds scary, but it's usually an easy fix. A white screen often means a plugin conflict. You installed something that doesn't play well with your theme.
Here's what to do: Log into your SiteGround dashboard. Find the “Site Tools” section. Look for “Staging” and create a staging copy of your site. This lets you test fixes without breaking your live site.
On your staging site, turn off all your plugins. Then turn them back on one by one. After each one, check your site. When the white screen comes back, you've found the problem plugin. Delete it or find a different one.
Login Problems
Can't get into your WordPress dashboard? No worries. Go to yoursite.com/wp-admin. Click “Lost your password?” Enter your email. You'll get a reset link within a few minutes.
If that doesn't work, ask SiteGround support for help. They have a 24/7 live chat. Just tell them you're locked out. They'll walk you through the fix in about 5 minutes.
Slow Loading Times
Is your site taking forever to load? First, check your image sizes. Big photos slow everything down. Use a free tool like TinyPNG to shrink them. Aim for files under 100 KB each.
Also, turn on SiteGround's caching feature. It's in your Site Tools under “Speed.” One click can make your site load 3x faster.
Conclusion
Setting up your WordPress site on SiteGround doesn't have to be hard. You've now got a solid plan to follow, from picking a plan to fixing common issues. In fact, most users get their site live in under 30 minutes.
Your next step is simple: log into your SiteGround account and start building. Try the WordPress themes and plugins we talked about. Don't forget to check your site's speed using tools like GTmetrix. A fast site keeps visitors happy and helps you rank higher in search results.
If you run into trouble, SiteGround's 24/7 support team is just a chat away. They answer most questions in under 2 minutes. You've got this. Now go make your site something you're proud of.
For more help, check out our guides on choosing themes and writing your first blog post. Happy building!
Affiliate Disclosure: This article contains affiliate links. If you make a purchase through these links, we may earn a commission at no additional cost to you. We only recommend products and services we believe will add value to our readers.
Content Notice: This article was created with AI assistance and reviewed by our editorial team for accuracy, quality, and compliance. We use AI to help research and structure content, but all recommendations are based on thorough evaluation.